

Getting started only takes a few minutes.
In this guide we will walk you through the process of setting up your account, sending your first message, creating your first task, and more.
Welcome to Communicare.
Download the Getting Started guide here.
1. Download the app.

Communicare is available on the Apple App Store via the link below (Android and Google support coming soon.)
2. Open the app and press “sign up.”


You will be prompted to sign up as either a patient or provider. Be sure to choose the option that best fits you.
Once you have made a decision you will be prompted to fill out some basic information about yourself. Once you are finished, press “submit”.

3. Navigate to the “Login” page and login with your account.
To do so, enter the email address you chose to use for your account as well as the password you have created.

4. MFA verification.
After logging in, you will be sent to the MFA verification page.
Shortly after arriving on this page you will receive an email at the address you used to login. This email will contain an MFA verification code. Type this code into the box and press “Verify Code”.

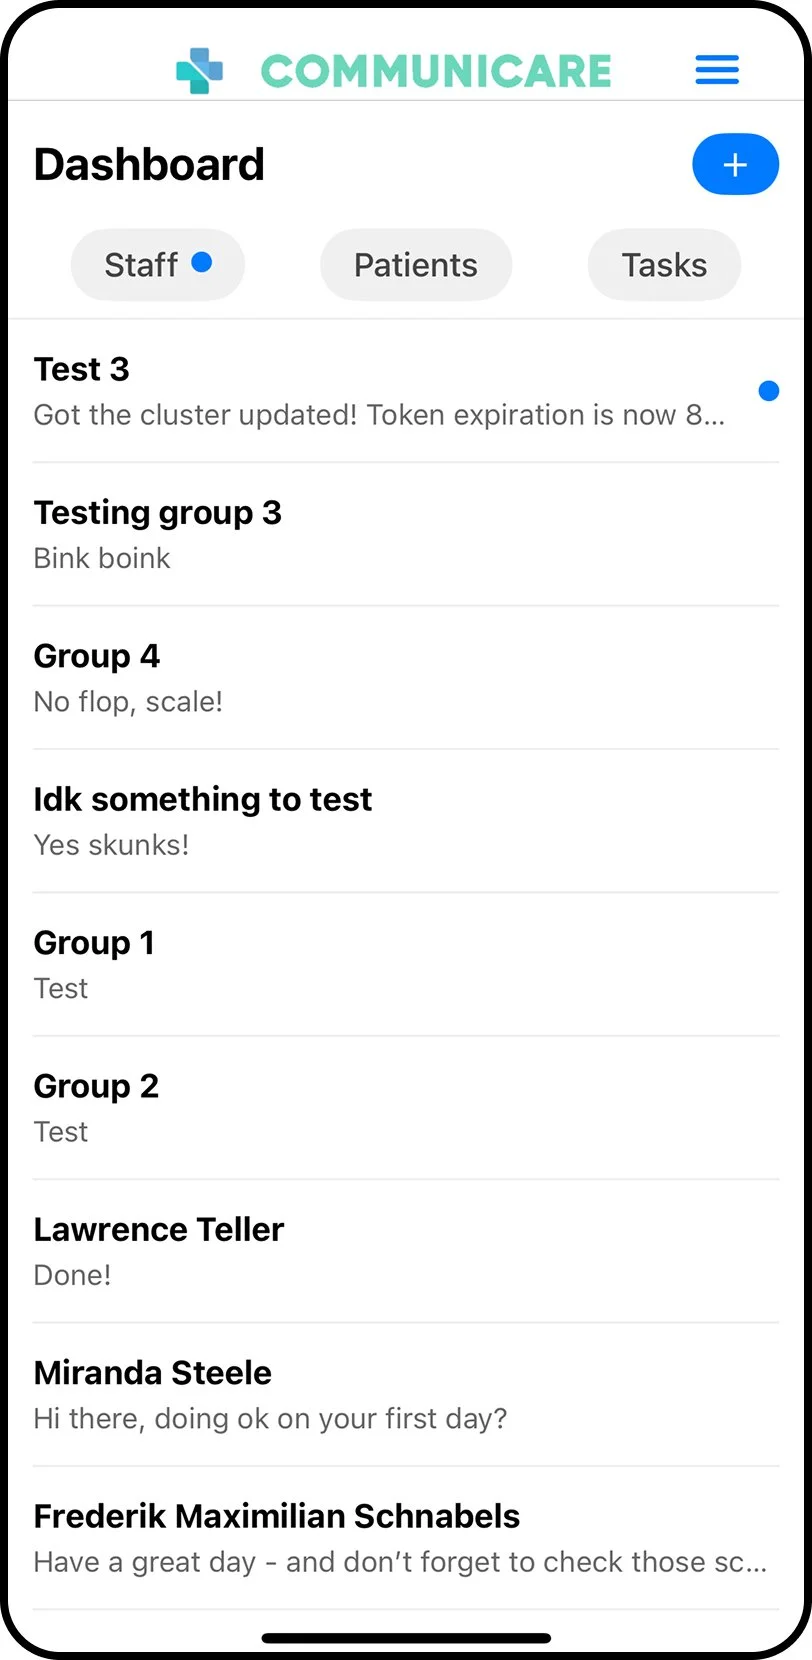
5. Welcome to your dashboard.
Once your MFA code is verified you will gain access to your dashboard.
Here you will find all of your messages (both staff and patient) and tasks (completed and active).

Using the “+” (plus) button in the top right of the dashboard will allow you to create new messages and group chats or new tasks.
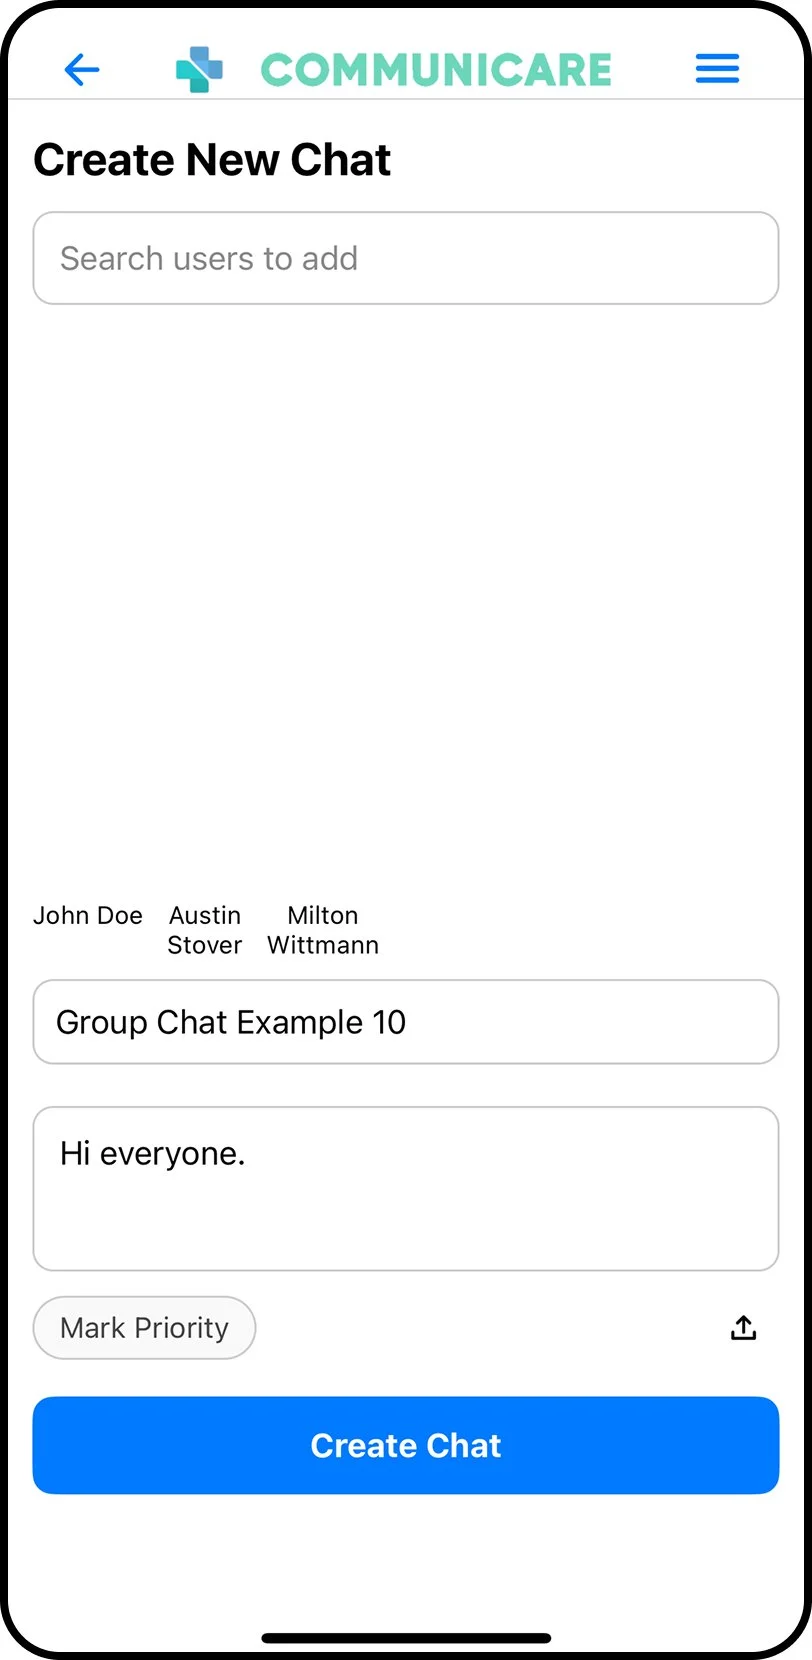
6. Creating new chats.
When creating a new chat, first add recipients (add only one recipient to send a direct message) and give the chat a name (not available for direct messages). Then go ahead and type your first message you would like to send to that group or individual and press “Create”.
Under the “Tasks” subsection of the dashboard you can toggle task filters and use the “+” button in the top right to create and assign a new task to a staff member or patient.
7. Creating new tasks.
When creating a new task, be sure to give the task a title, description, due date and time, a priority level, and recipients.

We recommend using the “Low” priority setting for tasks that are not urgent and can be completed at any point during a shift or even throughout the week.
“Medium” tasks should be normal patient care related tasks or other generally critical items.
“High” priority tasks should be reserved for near-emergency, or extremely critical assignments.
Please note: Communicare tasks are not a replacement for emergency communications and hospital procedures.
7. Start communicating!
Now you’re all set up and ready to start adding new contacts, chatting, and completing tasks.
Thank you for making patient privacy a top priority and for downloading Communicare.
If you have any questions please reach out to us at:
customerservice@communicare.io